This is the start of a new project, an electric boat from the swamps! Its amazing when you can see good in every thing. Just have ago you will be amazed what you can do. I called this post
recycled organic boat as you can see it was over run with organic matter of all sorts. I will post more images as the images become available on this post.


Posted by imagineering at
2:47 AM 0 comments  Links to this post

The photo above shows the patch with the timber supports removed

This photo shows the interior before glassing with silicon smoothed over the timber as a release agent

This is the hole with the timber attached to the hull before glassing the gaps were filled with some of the old gunnel timber. More photos will be posted when available. Does any one out there in computer land have any photos of my entry in the solar boat race in Canberra of a few years ago. cheers Stewart Posted by imagineering at
2:54 AM 0 comments Links to this post

The tops of the seats were cut out to find the treasures within. "Compost"

This is a religious boat cause its pretty holey

Posted by imagineering at
2:54 AM 0 comments Links to this post
Friday, October 16, 2009
The new stem post being fitted along with the gunnel timbers.

Posted by imagineering at
2:55 AM 0 comments Links to this post
There is one thing I was told when I was younger by a friend who made steam engines. Is to make one piece a day. In a steam engine there is about 360 pieces and at the end of the year you had the best part of that engine. Some parts took longer to make that is the boiler, and if this took another two months then you had an operational locomotive in fourteen months. Same goes for boats its just one piece at a time, and in a boat there is about two months worth. Note there are two pieces made and glued on to the hull. I will try to keep up dating this every day so you can check on how long it takes to restore a boat like this one. cheers Stewart

.

Posted by imagineering at
2:55 AM 0 comments Links to this post
Posted by imagineering at
2:56 AM 0 comments Links to this post
Wednesday, October 21, 2009
0 comments:
Posted by imagineering at
2:56 AM 0 comments Links to this post
Got the timber and have made some frames and glued them in. New transom beams. The deck is not far away. cheers Stewart


Posted by imagineering at
2:57 AM 0 comments Links to this post
Posted by imagineering at
2:57 AM 0 comments Links to this post
Monday, October 26, 2009
 I put in a couple of beams today

I put in a couple of beams today, some of the joint from yesterday failed and needed doing again. more glue was needed total cost to date is.
$ 97 for fibre glass.
$5 for timber
$17.85 for glue
$30.00 for deck timber
total=$149.85
Got some good spotted gum for the deck at Isons hardware store old stock and discontinued. I took the lot. cheers Stewart
Tuesday, October 27, 2009

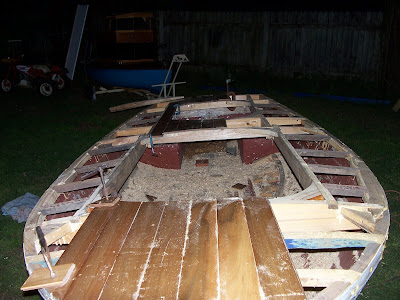
The planks on the deck have started to be laid. There are gaps in the deck and two planks will be glued to the deck timbers to keep them in line. The rest of the timbers rely on the first two to keep them in line

cheers Stewart
Wednesday, October 28, 2009
Thursday, October 29, 2009
As seen in the photo the deck beams have been laid and the deck is being glued down. It was a good day and a lot was accomplished.
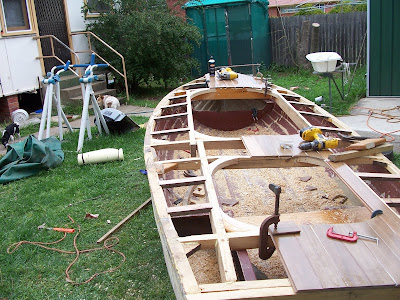
The deck material is spotted gum.
cheers Stewart
Posted by imagineering at
9:33 PM 
Friday, October 30, 2009


Well you wouldn't believe it , I didn't have enough timber for the deck and the stuff I have used is old stock and out of date. Its enough to make you throw your hat in the river and jump in after it. So its back to scavenging and Kmart and Bunnings don't have the stuff. So where do you get the timber to finish the deck, I goes into Independent Floors across the road from Bunnings and wallah and low and behold they have some stuff that can be milled down to size it is the same spotted gum as the last lot but a different colour, The top photo shows the colour difference and the bottom photo shows the difference in thickness the centre piece is the milled one. The centre photo shows today's progress. I also got the hinges for the stove for free. So tomorrow I have some work ahead of me.
A few years ago my mate Ray worked at the rubbish tip as a professional scavenger and this bloke rang him on his mobile and was placing an order for his requirements and the list was about as long as your arm and Ray finally stopped him with the words,"this ain't Kmart its the f#%&^*# rubbish tip for Pete's sake" when Ray got off the phone he said to me that he would fill the order without trouble and that it happens on a regular basis..
So now I expect things to come to me as required and it works. I started this project on the 13th and wonder I can get it in the water in a month from start.
cheers Stewart
Posted by imagineering at
9:05 PM
I have turned the boat to fix some of the smaller holes in the hull. I used the hoist on the trailer to do this.
Wednesday, November 25, 2009

This shows one of the smaller holes in the bow
This is one of the stress holes in the bottom from the seats at the rear of the boat
Thursday, November 26, 2009
I got to thank the little chinaman who makes these bungs by the thousands so I can put one of them on me boat. I buys it for $2.50 so the little worker gets less than that. So he says the greedy bustards and I sympathises with him cause its all relivent to where you live.
0 comments:
Saturday, December 5, 2009
It came time to turn the boat again and without the use of the crane on the trailer it would have been impossible by myself..
the next series of photos shows the process.
There it is easy done. I will put the outboard bracket on tomorrow.


0 comments:
Monday, December 7, 2009
I went out today to get four bolts for the boat and came home with a sail board. What do you do when you see a bargain. Well I got the bolts and will do some more work on the boat tomorrow..
Today I took the boat down to the water and put her in the liquid stuff. It floated well and when the motor was started it took off like a rocket even with the three hp motor. There was four tiny leaks in the hull and these were blocked up with some twigs pushed into the holes. The motor mount that I made bent under the strain of the motor and it tilted enough to send the fuel to the back of the fuel tank and the motor stopped, I was unable to get a real good idea of the performance but it will be good. I got out a paddle and it paddled so easily. I think I will make one of them single rowing oars that I read about as this boat will fly with one. The first sight of the hull and her lines suggested that she was fast and stable in that swamp. Turns out that I was right. This boat is a real goer. Sorry that there is no photos as I left the camera behind..The sail board that I bought yesterday turns out to be two sail boards and have all the equipment with them, I will make them into a land yacht. Remember the stove I was making it failed to burn properly but makes fantastic charcoal. Thanks for reading the blog, there will be no posts for a while as I am going to be busy for a while, probably a week.... Have a great Christmas and new year if I forget.... cheers Stewart
Sunday, December 20, 2009
I decided that the glue alone was not strong enough to hold the deck down and bought some stainless steel screws to hold it on. Total cost $103 + previous costings149.85 + bung 2.50 = $255.35. Then there is the bolts for the outboard brackets $42.00 + $255.35 = $297.35. Two spoons from the tip to make washers $1= Total to this point $298.35. I have been given some paint to paint the hull so what I got is going to be the colour of the hull.
This boat building is costly for a free boat. I haven't factored in time at commercial rates which would be roughly 22 days x say $15 per hour x eight hours per day would equal say 22 x 15 x 8 = $ 2640
Then there is electricity fuel to get parts cost of car and insurances tools and there depreciation add say $100 insurance fuel say $100 tools say $100 use able things like sandpaper and saw blades especially when I hits a nail. This total = $300
Add to that administration charges, using the trailer as an example. Cost of article + 10 % and this would be.
2640 labour
298.35 parts
$300 for fuel etc.
sub total $3038.35
Add administration charges $3038.35
grand total = $6076.70
Free boat not so free. Worth doing probably not but it is different. New laws in Australia require new boats to be engineered and certified, making the building of new boats impracticable for the armature
Tuesday, December 22, 2009
This is the bow with the gunnel rail screwed on. The stainless piece to stop the wood splitting is a cut down spoon screwed on.
This is the transom with the outboard motor bracket attached. Note the gunnel rail to the left also the bolt has a spoon as a washer to stop the bolt pulling into the wood. I was a bit dubious about hthe strength of the glue and screwed the deck down with stainless screws.
Posted by imagineering at
10:07 PM
Wednesday, December 23, 2009
Getting there the deck is on and screwed down and the gunnel rails are screwed on I used 2" by 6guage decking screws in stainless
The hull has just been painted and the rain started but I think it is dry enough all is looking good for a launch in the new year...The total days worked on the boat is to this day 24. Not bad from the first photo which I will display when the boat is totally finished on the same page for comparison..Crikey its two days till Christmas..cheers Stewart
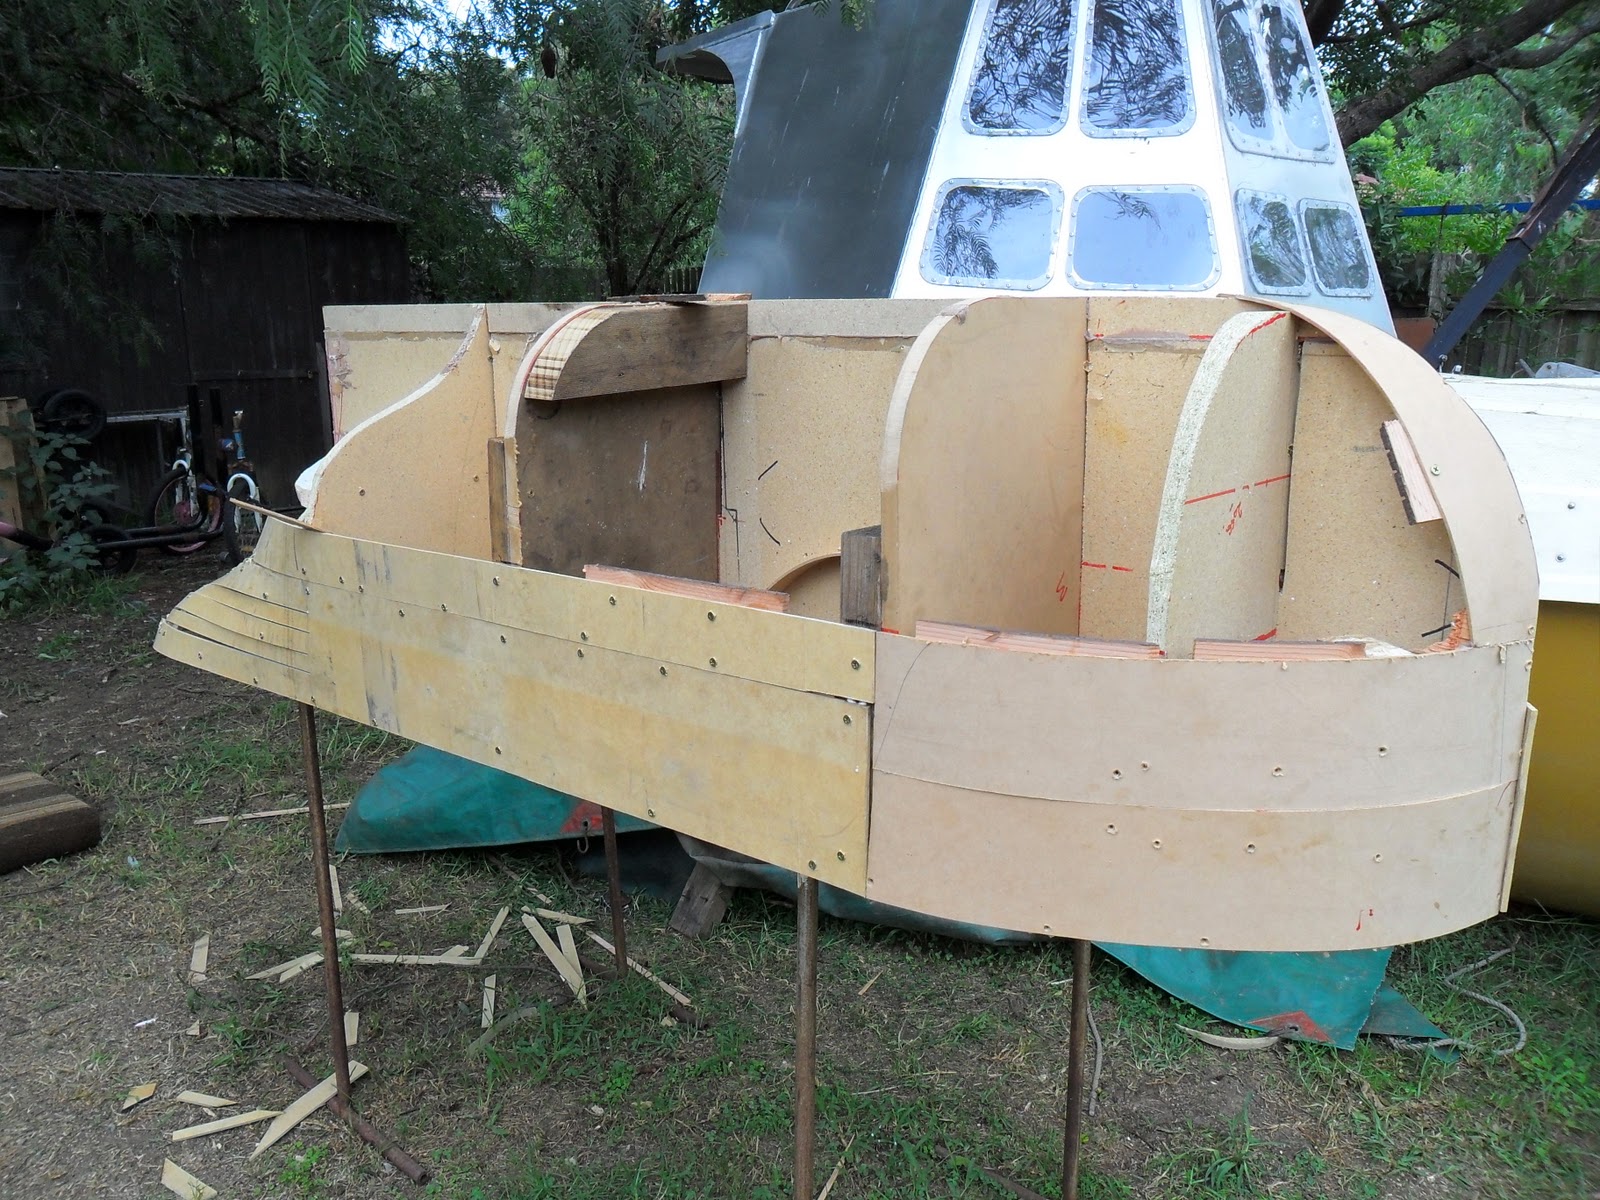


 Note the fingers cut into the wood.

 This shows some of the Origon planks used to support the sides from the inside.

 It all slots together and is really strong the glue is liquid nails.


 The photo above shows the patch with the timber supports removed
 This photo shows the interior before glassing with silicon smoothed over the timber as a release agent
 This is the hole with the timber attached to the hull before glassing the gaps were filled with some of the old gunnel timber. More photos will be posted when available. Does any one out there in computer land have any photos of my entry in the solar boat race in Canberra of a few years ago. cheers Stewart Posted by imagineering at 2:54 AM 0 comments
 The tops of the seats were cut out to find the treasures within. "Compost"
 This is a religious boat cause its pretty holey


 .


 I put in a couple of beams today
 I put in a couple of beams today, some of the joint from yesterday failed and needed doing again. more glue was needed total cost to date is.
 The planks on the deck have started to be laid. There are gaps in the deck and two planks will be glued to the deck timbers to keep them in line. The rest of the timbers rely on the first two to keep them in line

 Just a few more photos, you will notice the timbers have been routed on the edge for more deck beams. The centre line deck beam has been fitted and glued. I spent the rest of the day with a mate and went to the tip and scored some great items, which included a bench grinder and a three horse power robin engine and a cylinder for a bush stove, which I will post about in another post. The new vise glue foams more than the last lot and seams to bind better. cheers Stewart


 The deck material is spotted gum.


 This shows one of the smaller holes in the bow


